How to build a DIY weatherproof outdoor cat shelter for strays
This Shelter (or Pod) aims to be quick and easy to build, keep material costs very low, and provide comfort and protection for the stray animal. Its design also helps provide and retain heat (for colder climates), provides protection from the elements, and can be deployed next to other Pods. It can be assembled in 15-20 mins with basic knowhow. For another type of cat shelter, take a look here.
|
|
|---|---|

|
Step 1: Gather Materials and Tools NeededElectric (or manual) drill with a phillips driver head (the star-like one), caulk and caulk gun for water sealing, phillips wood screws roughly double (or slightly less) the width of the wood used, a couple of planks of wood or plywood, and some dry straw (not hay) or old clothing for warm bedding. That's it. |

|
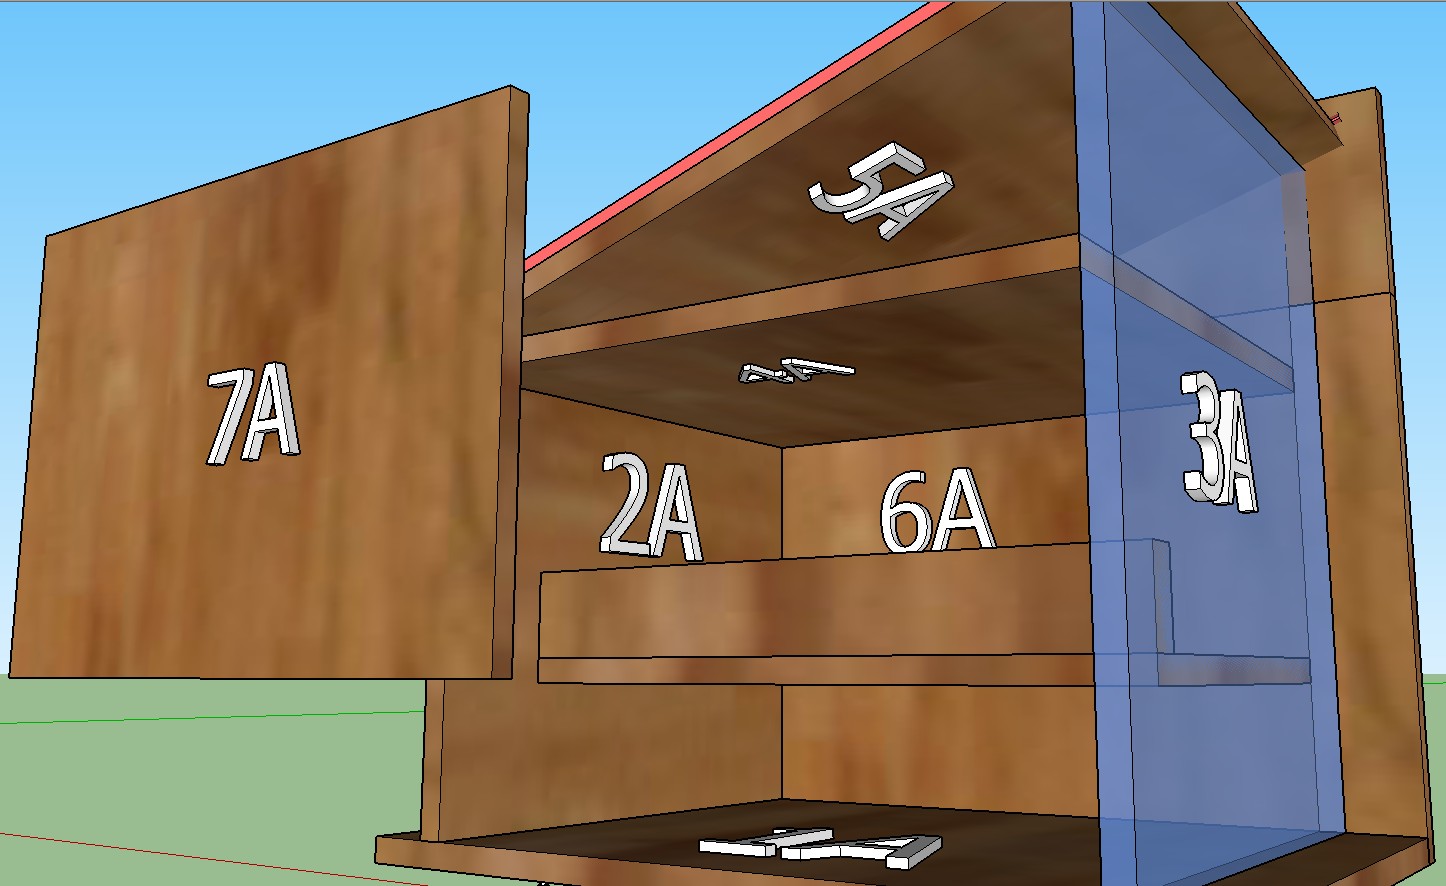
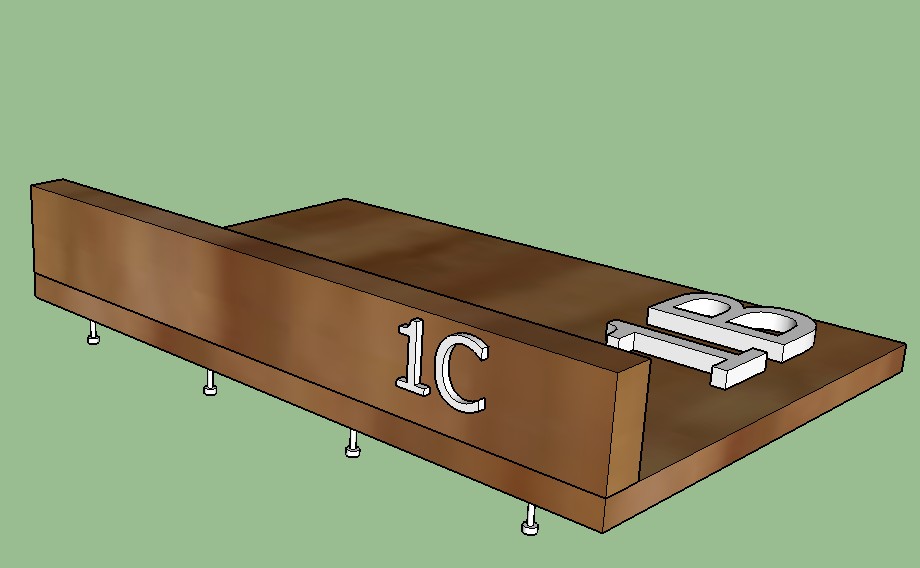
Step 2: Getting and cutting the woodIf you notice in the picture, there are 2 different board widths - one for the frame of the shelter, and another for the interior raised "bed" (see explanation down the page). This makes construction of the shelter easier as you only have to select 2 boards at the store. They usually also cut it for you, so make a note of the length relationships for the parts. Chose a wood type that can withstand the local weather fairly well. Notice all A parts denote the same plank of wood, of the same width. 1 and 5 are the same length (horizontally), as are 6 and 7. Select a plank whose width is enough to accomodate the bed and space for the cat (in height) and the entry space (width). 2A is a square, equal to the board width, and 3A is a piece slightly longer so you can create the inclined roof to drain water. The back piece directly above 6A is a smaller piece you can glue to 6A or fasten with screws to the other pieces. 4A is important to keep the heat trapped close to the cat. B and C parts need to be of planks of shorter width to fit inside and have enough space for the animal to climb in. |
|
Step 3: Assembling the interiorStart by assembling the interior (bedding shelf). Note the extra vertical stopper and thinner board/veneer. This retains the bedding material or clothing in place and keeps it from falling. The base of the bedding is slighly elevated so the animal sleeps closer to the heat retained (hot air moves up), leaving an accessible low level for food and water too. Ensure it isn't too elevated so the cat can easily jump up. A dog version may need some modifications and have the entry to the side, instead of below like this. Fasten then together with a few screws as in the picture. Drill a small diameter pilot hole for each screw first to guide the screws in easier on harder wood. |
|
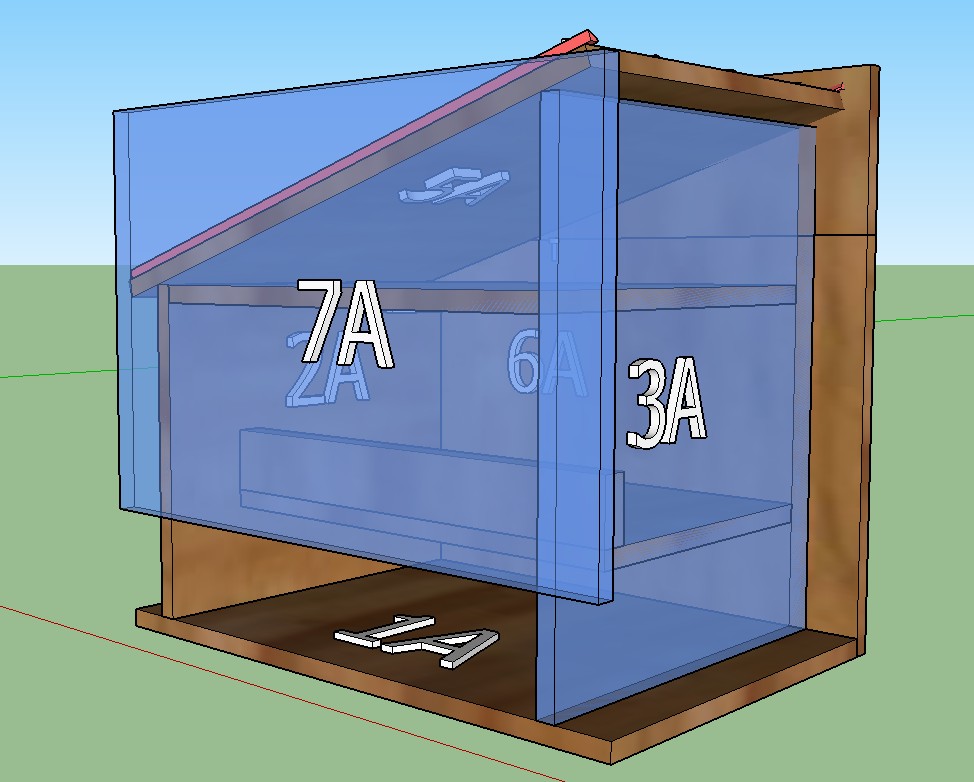
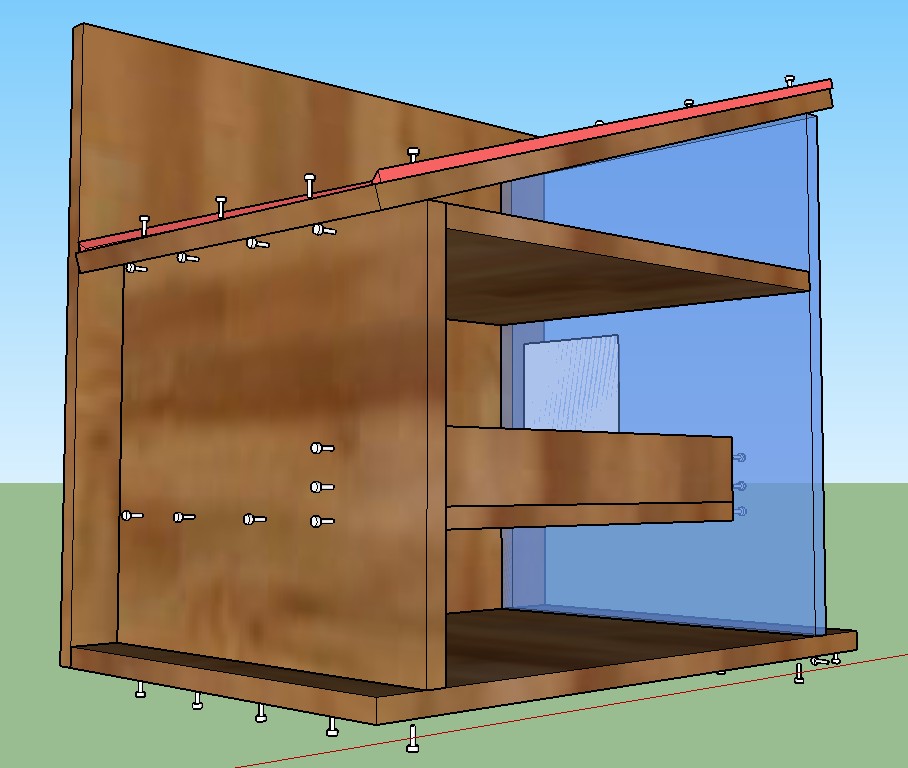
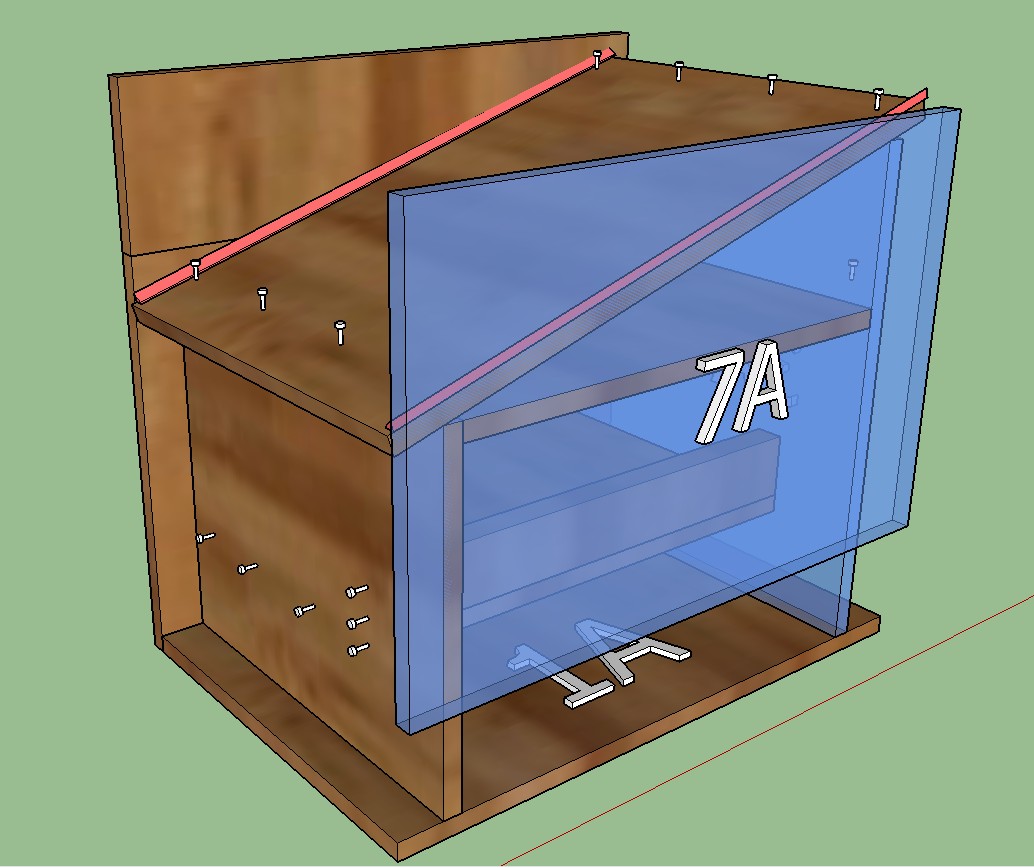
Step 4: Assembling the exteriorAssemble the exterior as shown in the pictures (some panels are transparent for clarity). Use the same technique of drilling a pilot hole before inserting each screw for added ease, and tilt it on its side if easier to work with. The 7A panel should be the last one to be placed. You can start with the bottom and the back, then the shorter side, and top bedding "roof". Then add bedding shelf, and lastly the taller side. You may want to turn it horizontally for easier assembly. Then screw the back to the interior parts so everything holds together, then the slanted roof, and finally the 7A panel if everything looks ok. If you need help, enlist a friend or family member to help you. Note the screws are fastened from the outside for easy assembly and disassembly. |
|
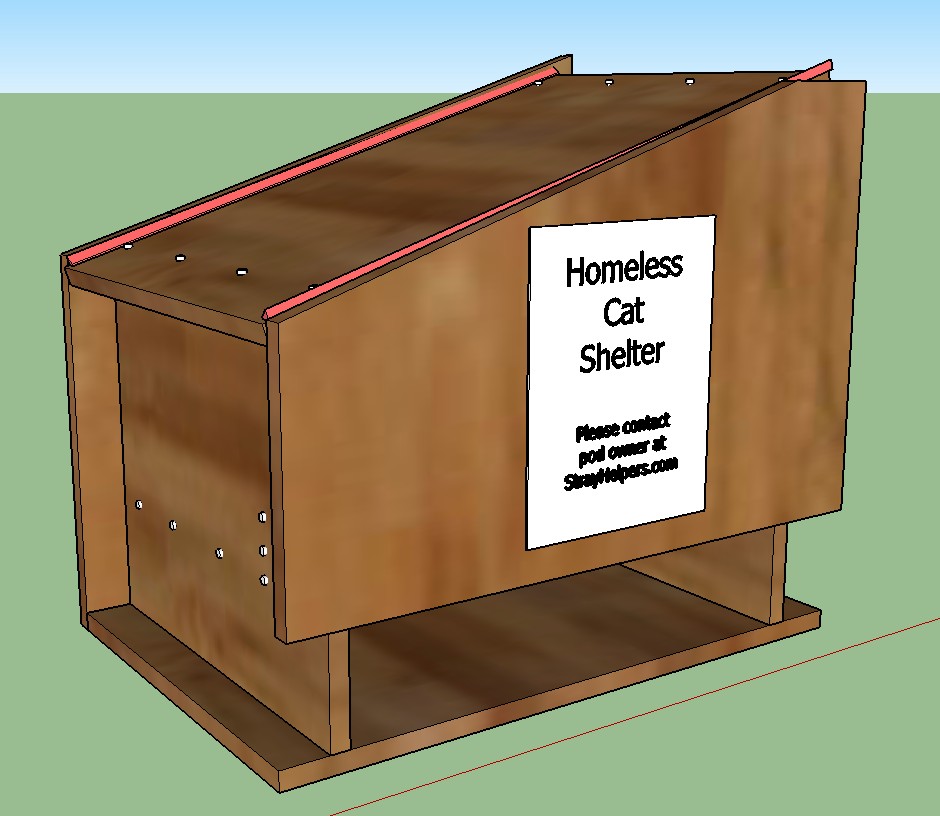
Step 5: Caulk the joints to prevent water leaking and hold the heat in, and final touchesUse the caulk to cover any joints where rain water can sip in (strip in red in picture) or heat from the animal breathing can escape out - remember, heat moves up. Additionally, if you or a friend has a miter saw, or is skillful with a circular saw, you can trim the top and front panel boards to match the inclination of the roof, and the roof joints, for a better look. |
|
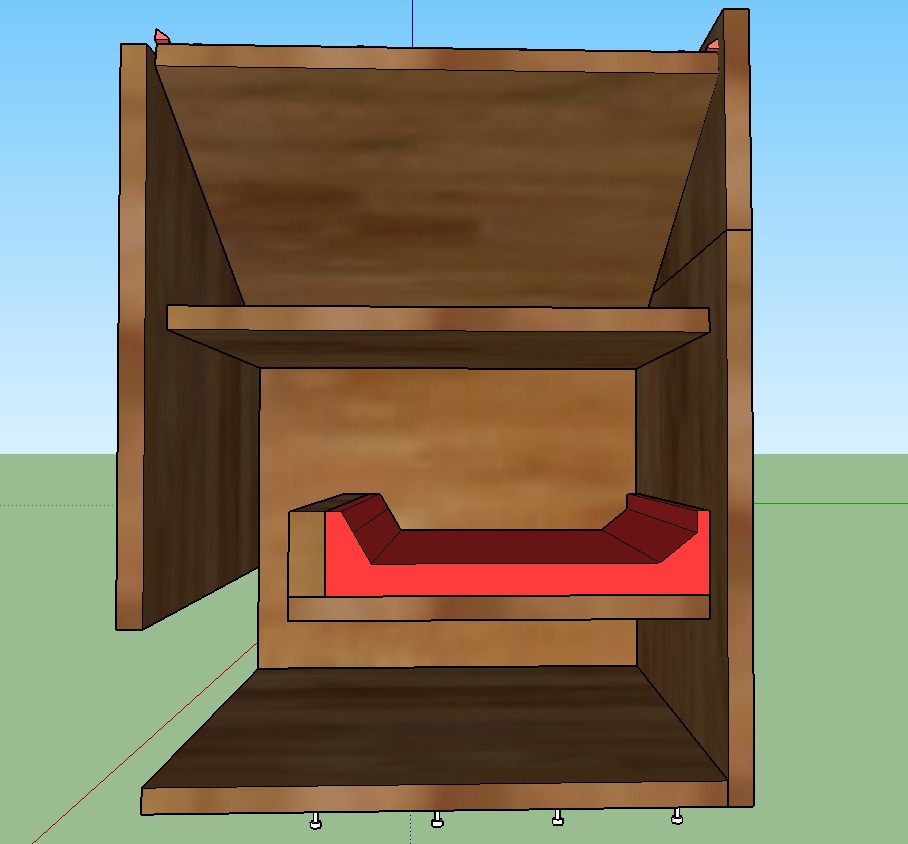
How the shelter pod worksIn this side view, you can see the cat can enter thru the opening at the bottom left, and has access to the bed (in red) by slightly jumping up. This allows them to sleep where the heat is maintained. A pod version for dogs may need a taller entrance to the side instead, and be generally bigger to accomodate their size. Also, the bed may need to be less elevated while maintaining a low ceiling to trap their body heat. Use dry straw (not hay) or a warm blanket for bedding. |
|
|
General considerationsTo prevent people from taking it down, only place the pod where you have received permission to do so (land owner, neighbors, etc.), and away from main roads and places prone to flooding or to the weather/winds/snow drifts, or even nightlife pedestrian traffic. Post a transparent document sheet (waterproof) with a note to explain it's a shelter for a homeless animal and people can contact you through the StrayHelpers.org site if needed without you having to leave your personal info. Connect with other local like-minded people thru the Pods map to build your stray assistance group. We can do more with less if we get together. Thank you and I hope this helps you and a stray! |